![]()
![]()
Making your dumb home alarm smart with an ESP32
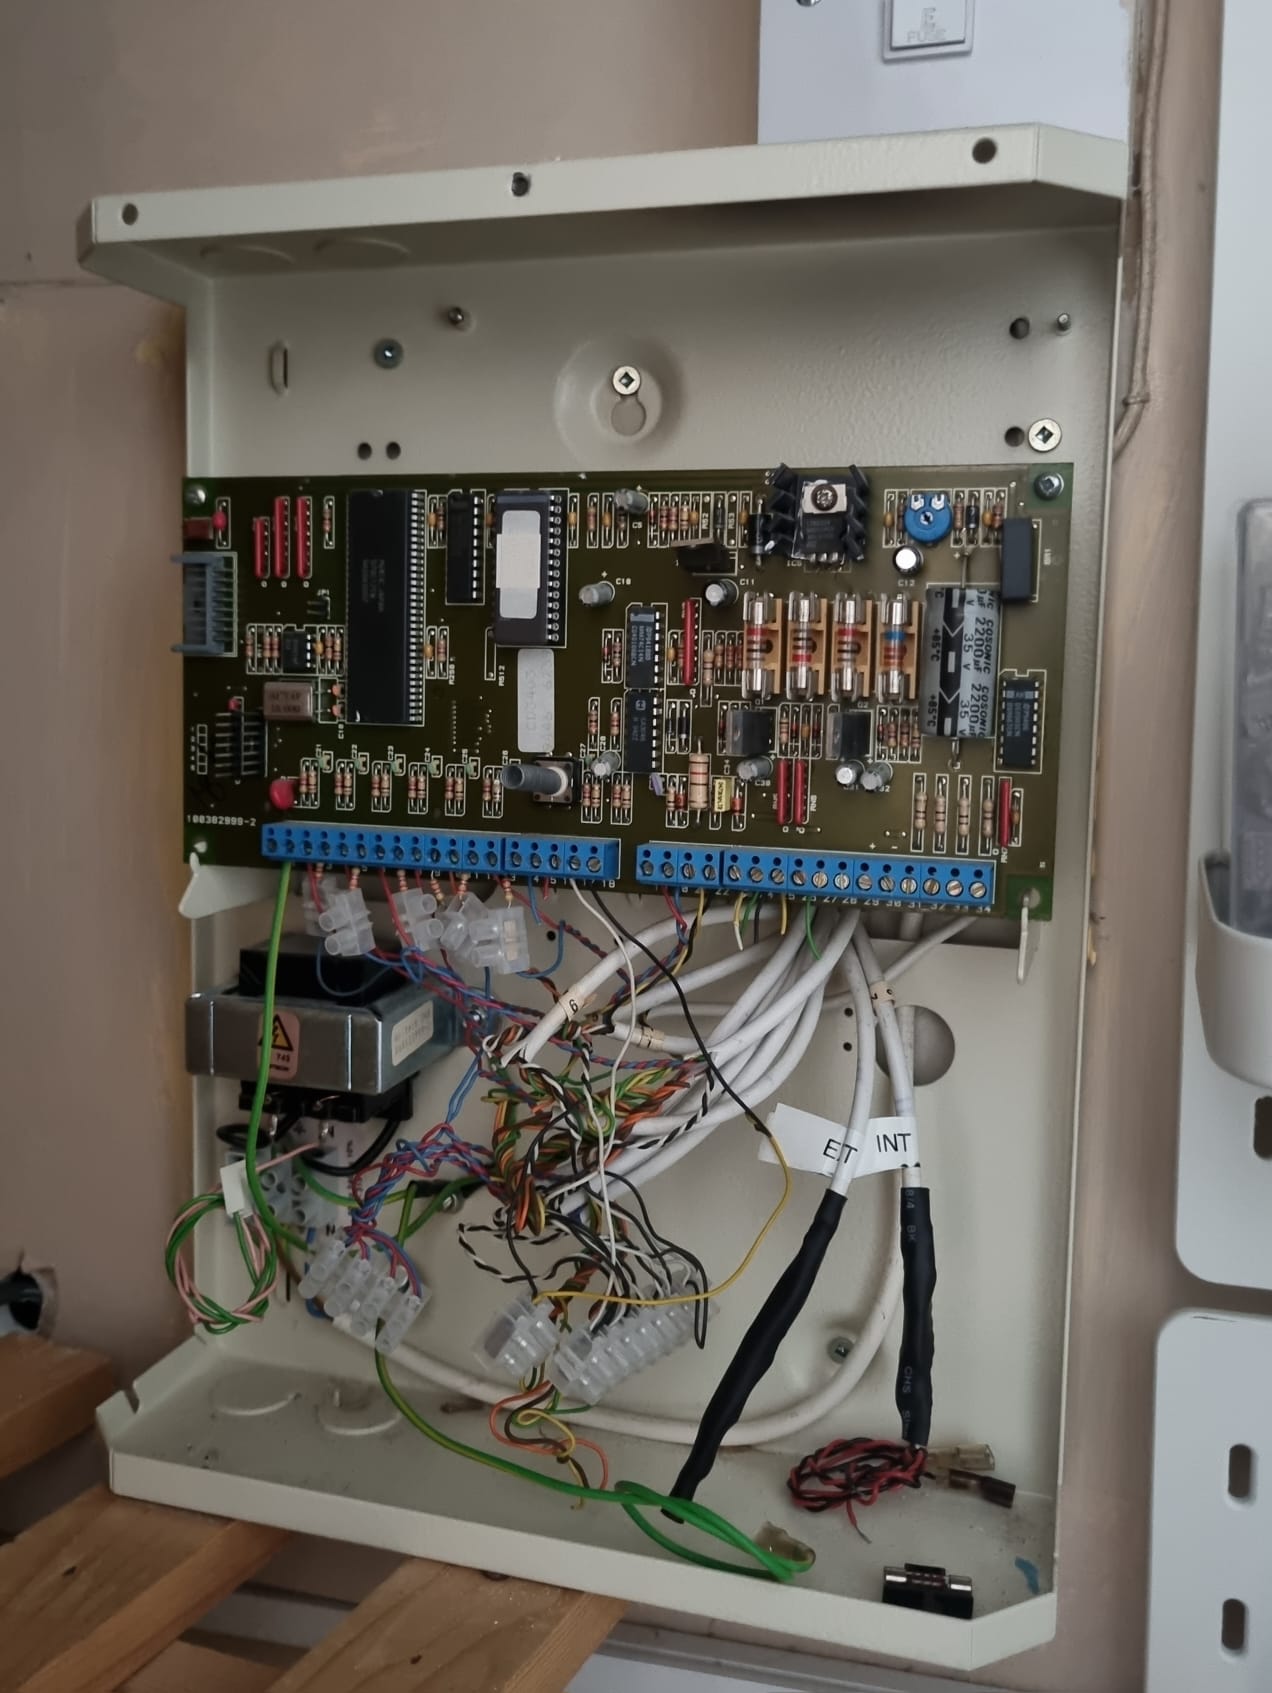
My wife and I were fortunate enough to buy a house recently which has presented many opportunities to integrate items with Home Assistant. The house came with an Aritech CS350 based alarm which was installed in 1994 – when I was one year old!
Although the 30 year old alarm worked, it was time for it to be retired in favour of the new solution. Disclaimer, this is not a replacement for an alarm system that is monitored by an alarm company. I’m doing this for fun and will likely replace this if/when we wish to install a monitored alarm system.
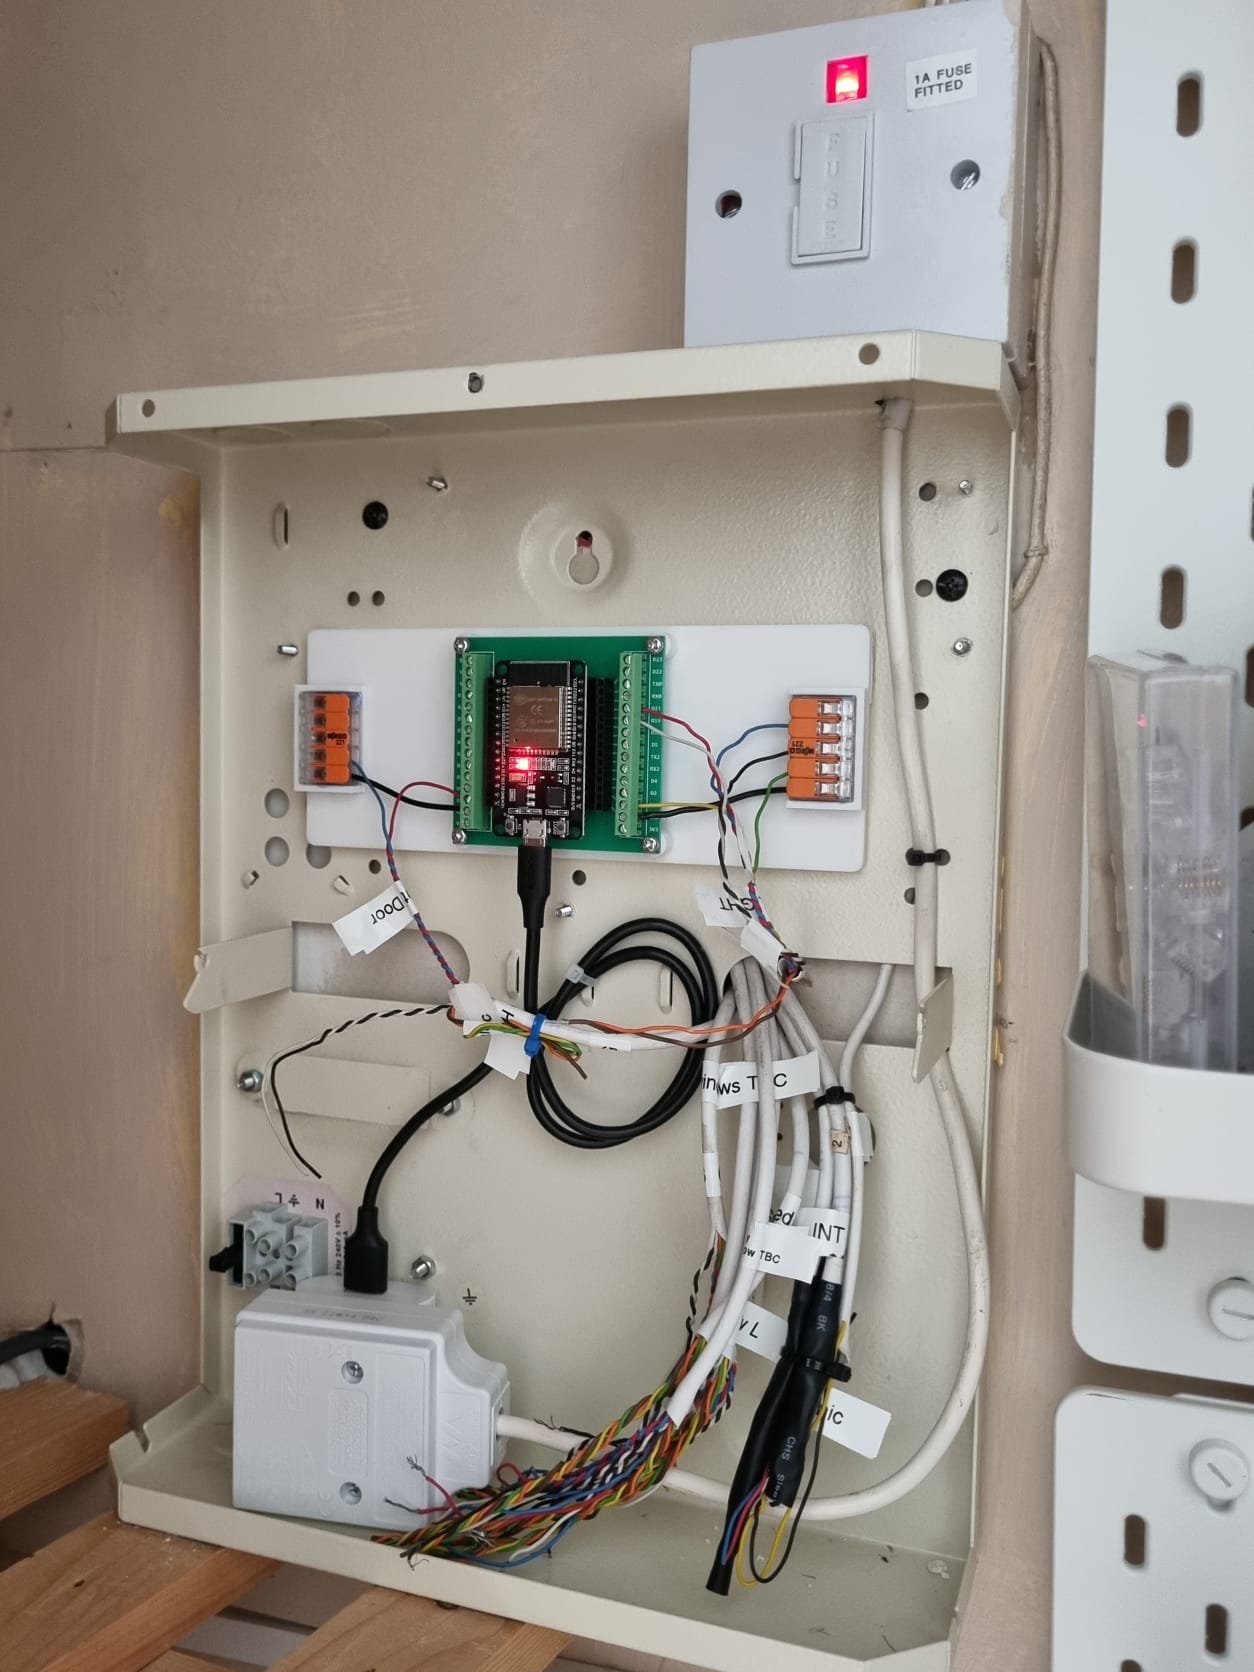
My solution is based on an ESP32 breakout board (Amazon – US, UK) which gives us tons of IO and an easy way to connect to Home Assistant using ESPHome. This was installed on a 3D printed backer board which included mounts for 2x 5 way Wago connectors (Amazon – US, UK) which we’ll use as ground bus bars for each sensor.
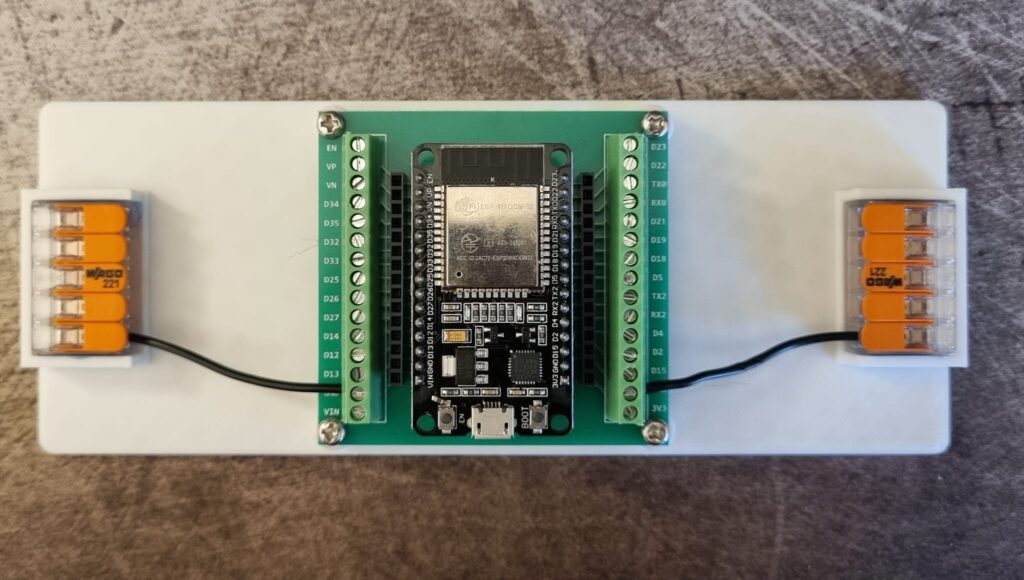
The hardest part of this installation was working out which cables went to which sensor in the house. Once that was done, installing the ESP32 wass pretty easy. Each door, window, vibration or tamper sensor is connected between ground (on the Wago bus bar) and a GPIO pin. We’ll enable the ESP32’s internal pull-up resistor in ESPHome to avoid any false alarms.
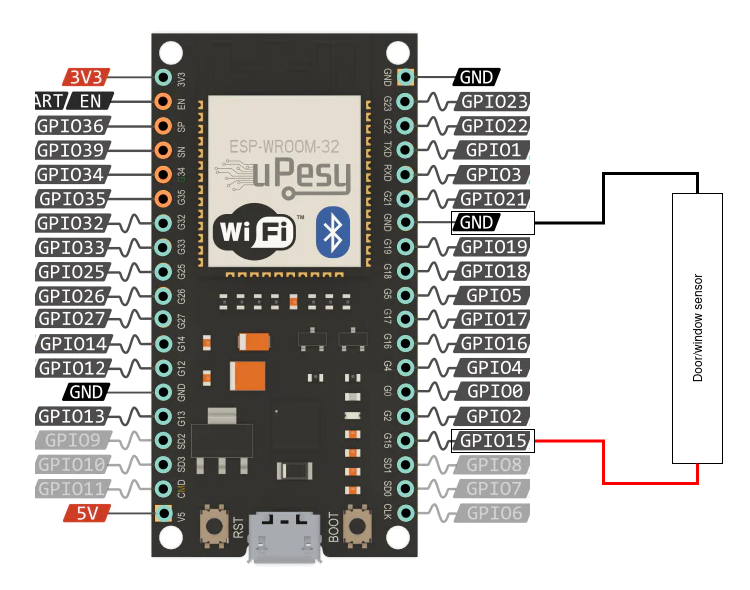
Once the wiring is done, you can connect the ESP32 to your laptop to set it up in ESPHome. Here is the code that I used to create each of the sensors in ESPHome.
binary_sensor:
  - platform: gpio
    device_class: door
    name: "Front Door"
    id: front_door
    pin:
      number: GPIO13
      mode: INPUT_PULLUP
      inverted: False

  - platform: gpio
    device_class: opening
    name: "Skylight"
    id: Skylight
    pin:
      number: GPIO4
      mode: INPUT_PULLUP
      inverted: False

  - platform: gpio
    device_class: tamper
    name: "Kitchen Tamper"
    id: Kitchen_Tamper
    pin:
      number: GPIO19
      mode: INPUT_PULLUP
      inverted: False

  - platform: gpio
    device_class: vibration
    name: "Kitchen Windows"
    id: Kitchen_Windows
    pin:
      number: GPIO15
      mode: INPUT_PULLUP
      inverted: False
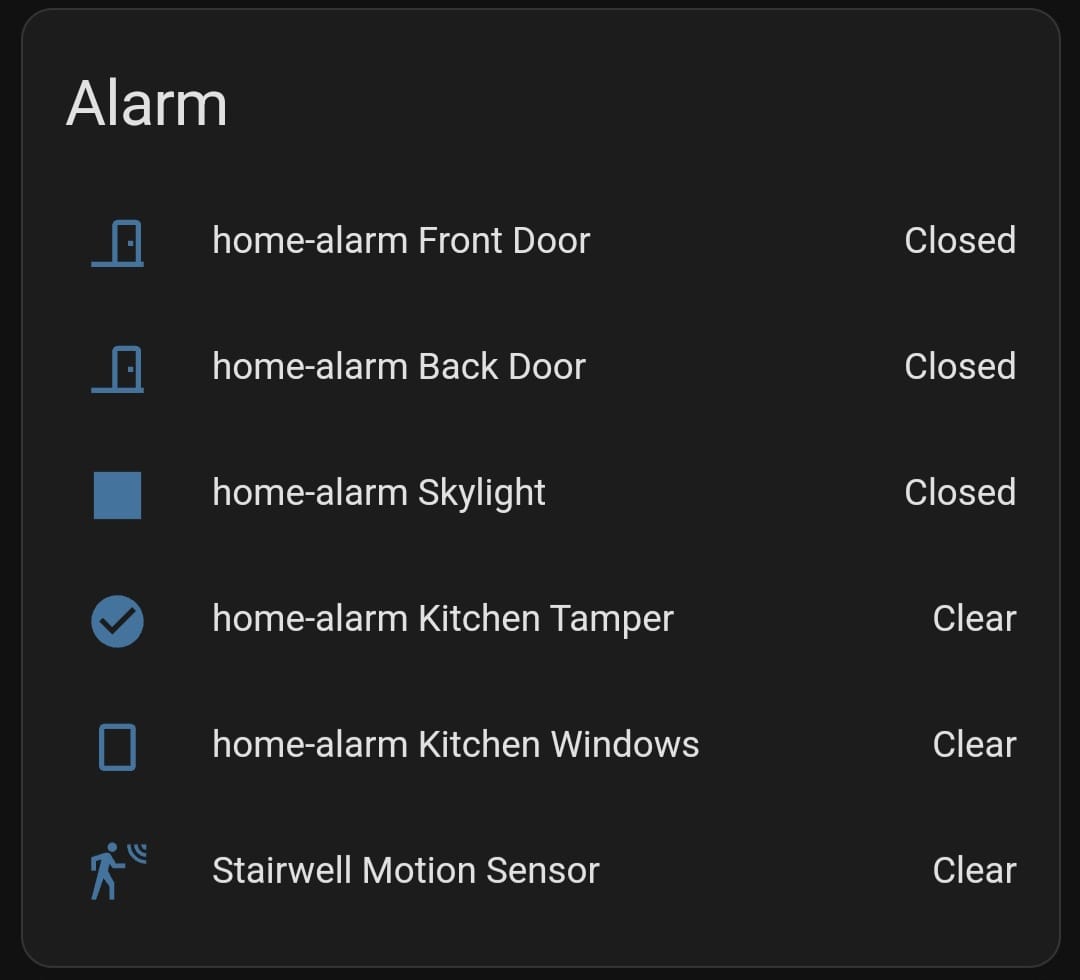
Once you’ve uploaded the config to the ESP32, you should see the entities pop up in Home Assistant.
Here is a side by side comparison of the old alarm vs the new solution in its place. For now, I’m only using a subset of the existing sensors but that will likely change over time.
*The product links in this post may contain affiliate links. Any commission earned is used to keep the servers running and the gin cool.
Thanks for making it to the end of the post!