Air quality monitor (MQ 5/7/135 based)
An ESP8266 mini based air quality monitor.
Please note that this should never be used to replace a proper CO monitor and should be used for informational purposes only.
Head on over to Thingiverse to grab the .stl files to print.
Parts:
- Wemos D1 mini (amazon.com)
- MQ 5 sensor
- MQ 7 sensor
- MQ 135 sensor
- ADS1115 ADC Analog to Digital Converter (amazon.com)
- M2.5 brass inserts (amazon.com)
- M2.5 screws and nuts (amazon.com)
- Hook up wire
- Heat shrink
Build guide
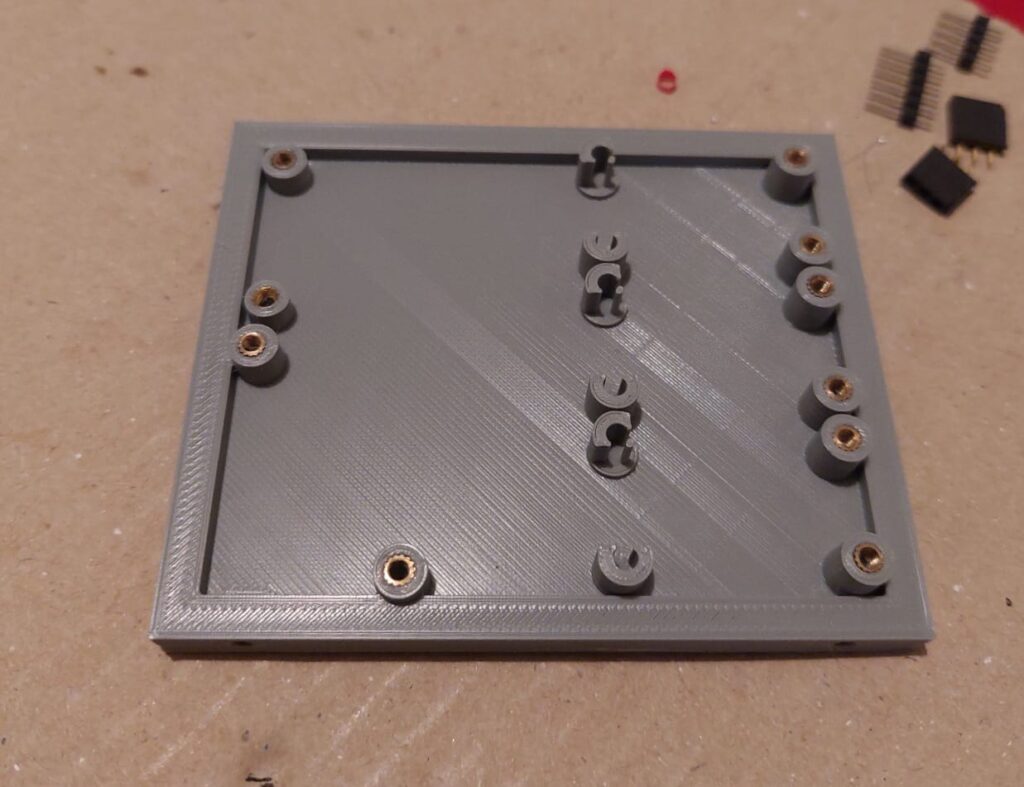
Step 1 – Print the back and use a soldering iron to insert the 14 x M2.5 brass insert nuts.
Step 2 – Use M2.5 screws to mount the MQ 5/7/135 sensors, analog to digital converter and Wemos D1 mini.
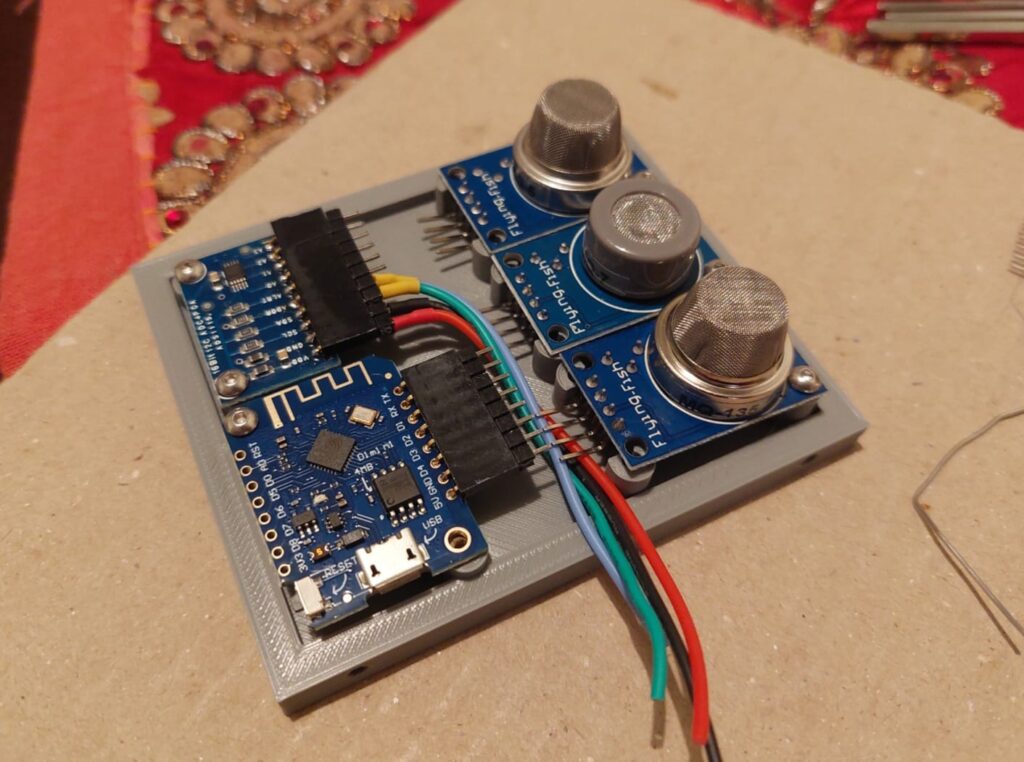
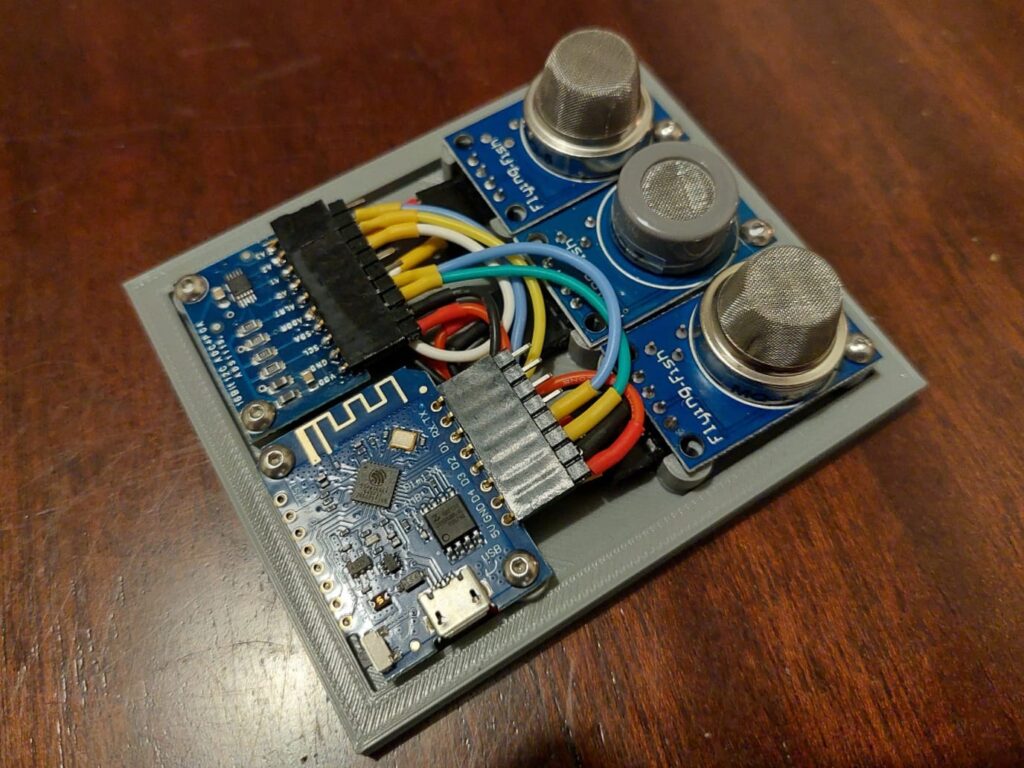
Step 3 – Connect everything together. This requires a lot of patience.
Step 4 – Time to get coding. Head over to ESPHome in Home Assistant and use the following code as a starting point. You’ll need to update some of the values and calibrate the sensors.
esphome:
  name: air-quality-monitor

esp8266:
  board: d1_mini

# Enable logging
logger:

# Enable Home Assistant API
api:
  encryption:
    key: "<your_key_here>"

ota:
  password: "<your_password_here>"

wifi:
  ssid: !secret wifi_ssid
  password: !secret wifi_password

  # Enable fallback hotspot (captive portal) in case wifi connection fails
  ap:
    ssid: "Air-quality-monitor Fallback Hotspot"
    password: "6JCdx#QryWEH6t!a%&@h"

captive_portal:

i2c:
  sda: D3
  scl: D4
  scan: true
  id: db_busa

ads1115:
  #  continuous_mode : on
 - address: 0x48
   id: ads1115_48
   continuous_mode: on

sensor:
  - name: "boiler_mq5_flammable_gas_sensor"
    id: boiler_mq5_flammable_gas_sensor #ads1115_48_a0
    ads1115_id: ads1115_48
    multiplexer: 'A0_GND'
    gain: 6.144
    platform: ads1115
    accuracy_decimals: 2
    update_interval: 30s
    filters:
      lambda: return (x/5 *100);
    unit_of_measurement: "%"

  - name: "boiler_mq7_co_sensor"
    id: boiler_mq7_co_sensor #ads1115_48_a1
    ads1115_id: ads1115_48
    multiplexer: 'A1_GND'
    gain: 6.144
    platform: ads1115
    accuracy_decimals: 2
    update_interval: 30s
    filters:
      lambda: return (x/5 *100);
    unit_of_measurement: "%"

  - name: "boiler_mq135_harmful_gas_sensor"
    id: boiler_mq135_harmful_gas_sensor #ads1115_48_a2
    ads1115_id: ads1115_48
    multiplexer: 'A2_GND'
    gain: 6.144
    platform: ads1115
    accuracy_decimals: 2
    update_interval: 30s
    filters:
      lambda: return (x/5 *100);
unit_of_measurement: "%" Step 5 – Print the lid, screw it on and you’re ready to go.
*The product links in this post may contain affiliate links. Any commission earned is used to keep the servers running and the gin cool.
Thanks for making it to the end of the post!


Hi,
Can you please share the simple schematic wiring from each sensor to adc and d1? I cant find it in the article and its too dificult to guess it from the picture.
It really helpful for newbie like me 🙂
Thanks for this great project.