![]()
![]()
Setting up Cloudflare Dynamic DNS in OPNsense
There are a few (conflicting) guides online that outline the process of setting up Cloudflare’s Dynamic DNS in OPNsense so I thought I’d create an up to date guide.
So… why should you use a Dynamic DNS service? In a nutshell, most residential Internet Service Providers use dynamic IP addresses which can result in your public IP changing on a regular basis. Dynamic DNS servers allow you to use a domain name (e.g. myhome.tristam.ie) which is updated regularly so you don’t need to worry about keeping track of your public IP.
Part 1 – Create a Cloudflare API token
For this project, you will need an API token from Cloudflare to update your DNS records.
Login to your Cloudflare account and head over to the dashboard.
Click on the profile icon in the top right corner and click My Profile.
Click on API Tokens in the left hand menu and Create Token.
From the list of API token templates, click Use template for the the Edit zone DNS template.
Under the Zone Resources section, click the right-most dropdown and choose the domain that you wish to use for this project and then click Continue to summary.
Double check that the API token has DNS:Edit permission to the domain that you selected and click Create Token .
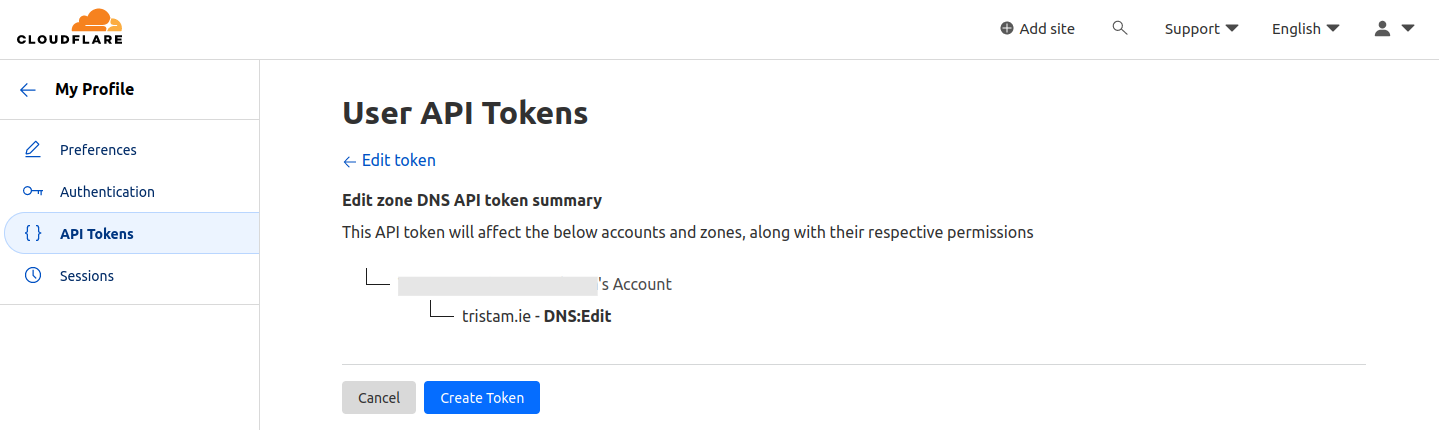
Now you should be presented with the API token that you will use in the next part. Store the token safely and don’t share it with anyone you don’t know and trust.
Part 2 – Install and setup the Dynamic DNS plugin in OPNsense
Login to OPNsense and navigate System > Firmware > Plugins and search for the os-ddclient plugin.
Click on the + icon to install the os-ddclient plugin.
When the plugin has installed, navigate to Services > Dynamic DNS > Settings and click on the + icon to add a new Dynamic DNS Account.
Enter the following information:
- Enabled: true
- Description: Cloudflare (Or whatever you want)
- Service: Cloudflare
- Username: token (the word, not your API token)
- Password: <The cloudflare API key you generated earlier>
- Zone: your.domain (e.g. tristam.ie)
- Hostname: full domain name (e.g. myhome.tristam.ie)
- Check ip method: Interface
- Interface to monitor: WAN
- Force SSL: true
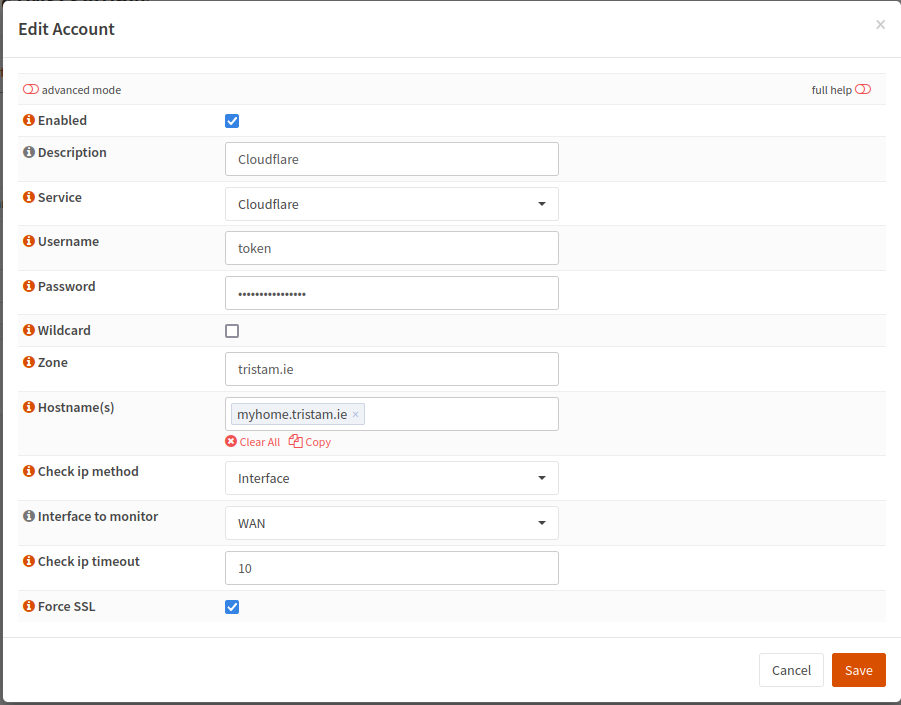
Then you can hit save and you should be ready to go.
OPNsense will check your IP and DNS entry every 5 minutes to ensure they match. If they don’t match, the DNS entry will be updated. If you want to change the interval, click on the General Settings of the Dynamic DNS plugin and update the interval field (note this is stored in seconds).
*The product links in this post may contain affiliate links. I donate 20% of these earnings to the Good Work Foundation to help innovate learning in South Africa’s rural communities.
Thanks for making it to the end of the post!